Table of Contents
Documentation
| Topic | Link |
|---|---|
| Getting Started | Getting Started |
| Using the Simulator | Using the Simulator |
| Using Vehicles | Using Vehicles |
| Using Walkers | Using Walkers |
| Sensors | Sensors |
| Setupping sensors | Setupping sensor |
| Creating own maps | Creating own maps |
| Building from source on Linux | Building on Linux |
| Building from source on Windows | Building on Windows |
| Installing on Linux | Installing on Linux |
| Installing on Windows | Installing on Windows |
Moving vehicle to garage
Setting up vehicle's sensors happens inside the "Garage".
There are 2 ways to move a vehicle into the garage:
A) Right click the vehicle which will open up a context menu. In the Context menu, click on the 'Move to garage' option. After you exit the garage, vehicle will be teleported back to the previous location.
B) Open up the Vehicle Listing menu, and press the Garage icon button next to the vehicle name.
Note. All Sensors are disabled when vehicle is moved into the garage. So for example changing camera parameters may not visually update on the camera window.
Garage user interface
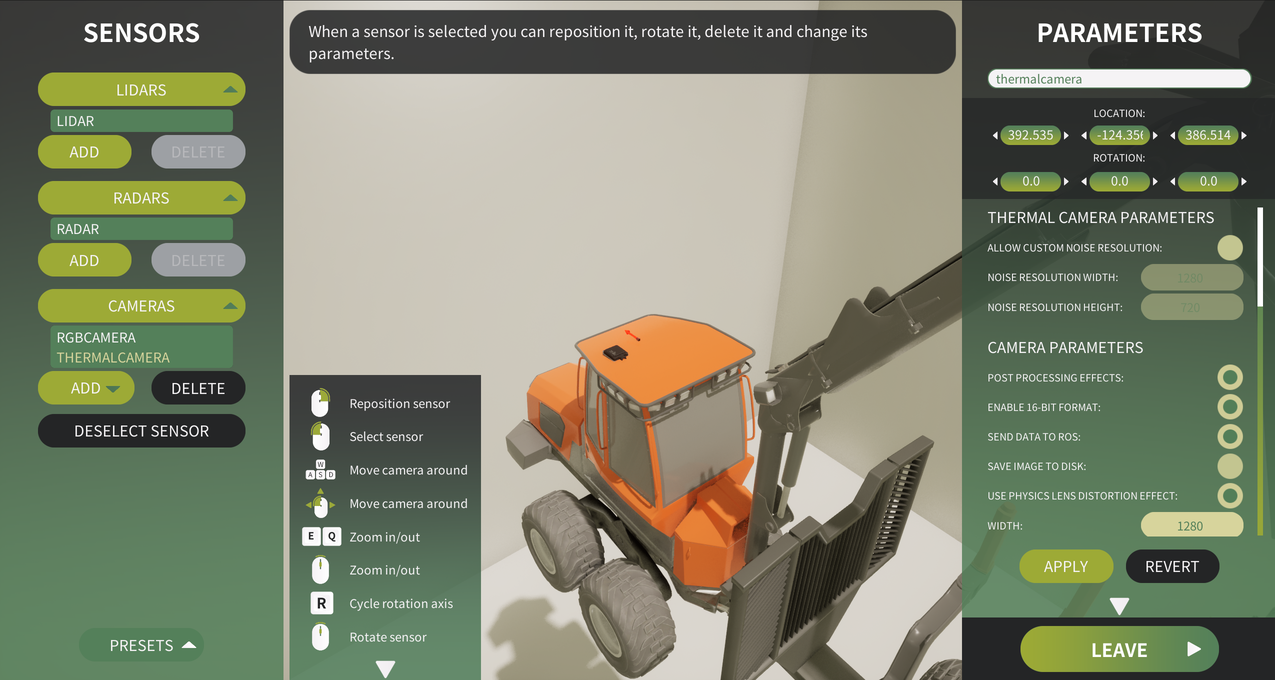
Vehicle's sensors are listed on the left side. Lidars, radars and cameras are in separate lists. These lists can be closed/opened by clicking on the list header. Below the sensor lists is the Presets-button which will show the Presets-menu. Next to those is the guide for the controls. This guide can be closed by clicking on the arrow below the guide. On the right is the parameters menu which will open when a sensor has been selected either by clicking on the sensors on the list, or by adding a new one. This parameters menu can also be hidden with the arrow button below it. Below the parameters menu is the Leave-button which will leave the garage and teleport the vehicle back to its previous location.
Adding sensors
To add a sensor, click on one of the ADD-buttons below the sensor lists. After this right click on the vehicle to spawn the sensor to that location. The newly added sensor appears on the list and the parameters menu will open.
Selecting sensor and changing parameters
To select a sensor, you can either: A) Left-click the sensor 3D-model, or B) Click the sensor's name on the sensor lists
After selecting a sensor, the right side parameters menu will be populated with the selected sensor's data. To change the parameters, or the sensor's name, modify the values and press the APPLY-button which will save the input values to the sensor. If you don't want to save the new input values, press the REVERT-button. The revert will only revert the unsaved input values, and can't be used to revert saved values.
Removing sensors
To remove a sensor, select it from the list and press the DELETE-button. Deletion requires confirmation so you have to press it again after it comes enabled again.
Sensor presets
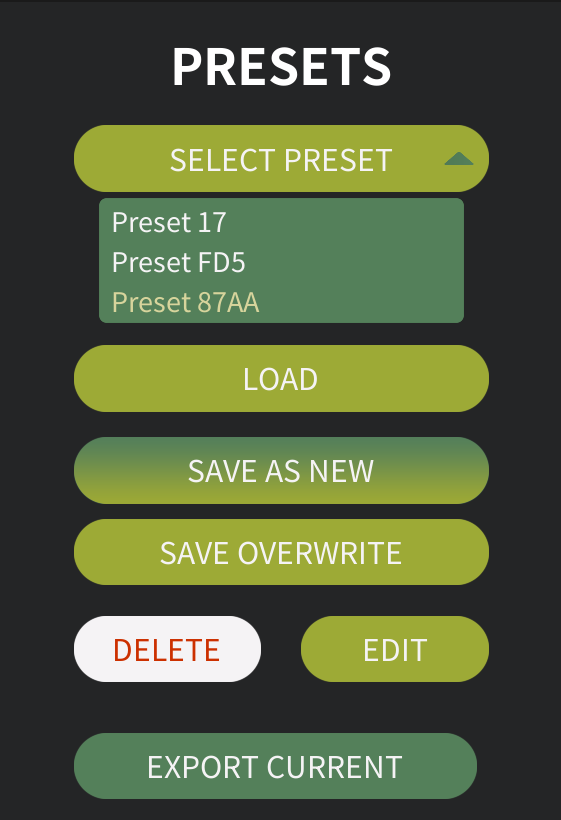
Click on the Presets-button to open up the presets menu. Here you can save current sensors configuration to a presets which can later be loaded from the user interface. Menu consists of a list which shows all the existing presets. Clicking the list item will select that preset.
Options:
- Press the LOAD-button to replace current sensor configuration with this preset
- Press the "SAVE AS NEW"-button to save current sensors configuration to a new preset. A prompt will be shown to ask for the preset name
- Press the "SAVE OVERWRITE"-button to save current sensors configuration to selected preset overwriting the sensors data
- Press the DELETE-button to delete the preset (deletion requires confirmation click)
- Press the EDIT-button to edit the preset's name. A prompt will be shown to ask for the new name
- Press the "EXPORT CURRENT"-button to export the current sensors configuration (not the selected preset) to a JSON-file. A prompt will be shown to ask for the filename
Export to JSON
JSON-file (.json) will be exported to SIMULATION_ROOT/Data/ExportedJsonFiles/. Below is an example how a Drone's JSON could look like.