Table of Contents
- Documentation
- Terminology
- General information
- Keybindings
- Maps
- Moving around the map
- User interfaces
- Simulator Settings
- Spawning things in the Simulator
- Interacting with the Simulator (ROS)
- Using Vehicles
- Using and setupping Sensors
- Using and setupping Walkers
- Recording and Storage of Data
- Simulator JSON structure
- Simulator ROS topics
- Simulator Launch arguments
Documentation
| Topic | Link |
|---|---|
| Getting Started | Getting Started |
| Using the Simulator | Using the Simulator |
| Using Vehicles | Using Vehicles |
| Using Walkers | Using Walkers |
| Sensors | Sensors |
| Data collection | Data collection |
| Creating own maps | Creating own maps |
| Building from source on Linux | Building on Linux |
| Building from source on Windows | Building on Windows |
| Installing on Linux | Installing on Linux |
| Installing on Windows | Installing on Windows |
Terminology
Some of the terminology used in these documentations.
| Term | Description |
|---|---|
| Actor | A placeable or spawnable object in the level (e.g., vehicles, sensors, walkers, props). In Unreal Engine, almost everything that exists in the world is an Actor and can have Components attached to add behavior or visuals. |
| Spectator | A free-flying, non-physical camera/pawn used for viewing the level. Useful for inspections, screenshots, and aligning shots without affecting gameplay or simulation state. |
| Walker | A pedestrian-type AI agent that navigates along paths or navmeshes. The simulator has three walker types, Worker (human), Reindeer and Moose. |
| Spawn | The act of creating new an instance of an Actor at runtime. |
| Map / Level | A saved world or environment in Unreal Engine. A Level contains Actors, lights etc. The terms “Map” and “Level” are often used interchangeably. In the simulator, it defines the environment where scenarios take place. |
| ROS / ROS2 | Robot Operating System. A collection of tools, libraries, and conventions that simplify building robot applications. The simulator uses ROS topics to send and receive data. |
| ROS Command | A simulator feature that maps incoming ROS (usually string or structured) messages to specific simulator actions (e.g., spawn/despawn, start/stop recording, move actor, change weather). Acts as a command bridge between ROS and the simulator. |
| Build / Package | The compiled, distributable version of the simulator (.exe or .sh). Use packaged build is preferred as the performance is much better than in Editor. |
| ISM | Instanced static mesh component. A rendering technique for drawing many copies of the same Static Mesh efficiently. Instance Segmentation Camera sensor doesn't support this, thus there are levels with and without ISM instances. |
| Overlap | In the simulator, an overlap occurs when one actor’s collision/trigger volume intersects another’s without a physical collision. It fires a begin overlap when entering and an end overlap when leaving. |
General information
For optimal performance, it's recommended to use the simulator in the shipping packaged build rather than running it in the Unreal Editor. The shipping build allows the engine to bypass Unreal Editor overhead, resulting in better performance.
If you are running the simulator in Unreal Editor, make sure to set 'Use less CPU in background' to false in Unreal Editor settings.
To package the project, you can use the .bat or .sh scripts found in the ROOT/Unreal/Agrarsense directory. Alternatively, you can package the project through the Editor UI.
Keybindings
| Key | Action |
|---|---|
| W A S D | Move around with the Spectator actor |
| E | Move Spectator actor down |
| Q | Move Spectator actor up |
| B | Show/Hide all UI elements |
| Mouse click and drag | Turn Spectator actor |
| CTRL + F9 | Opens/closes Developer tools widget |
| CTRL + L | Opens Lidar Visualizer Window (if lidar exists) |
| CTRL + O | Opens file explorer at data location |
| F11 | Toggle between fullscreen/Windowed mode |
| F12 | Takes screenshot |
| § / ½ | Open/Close Unreal Engine Console |
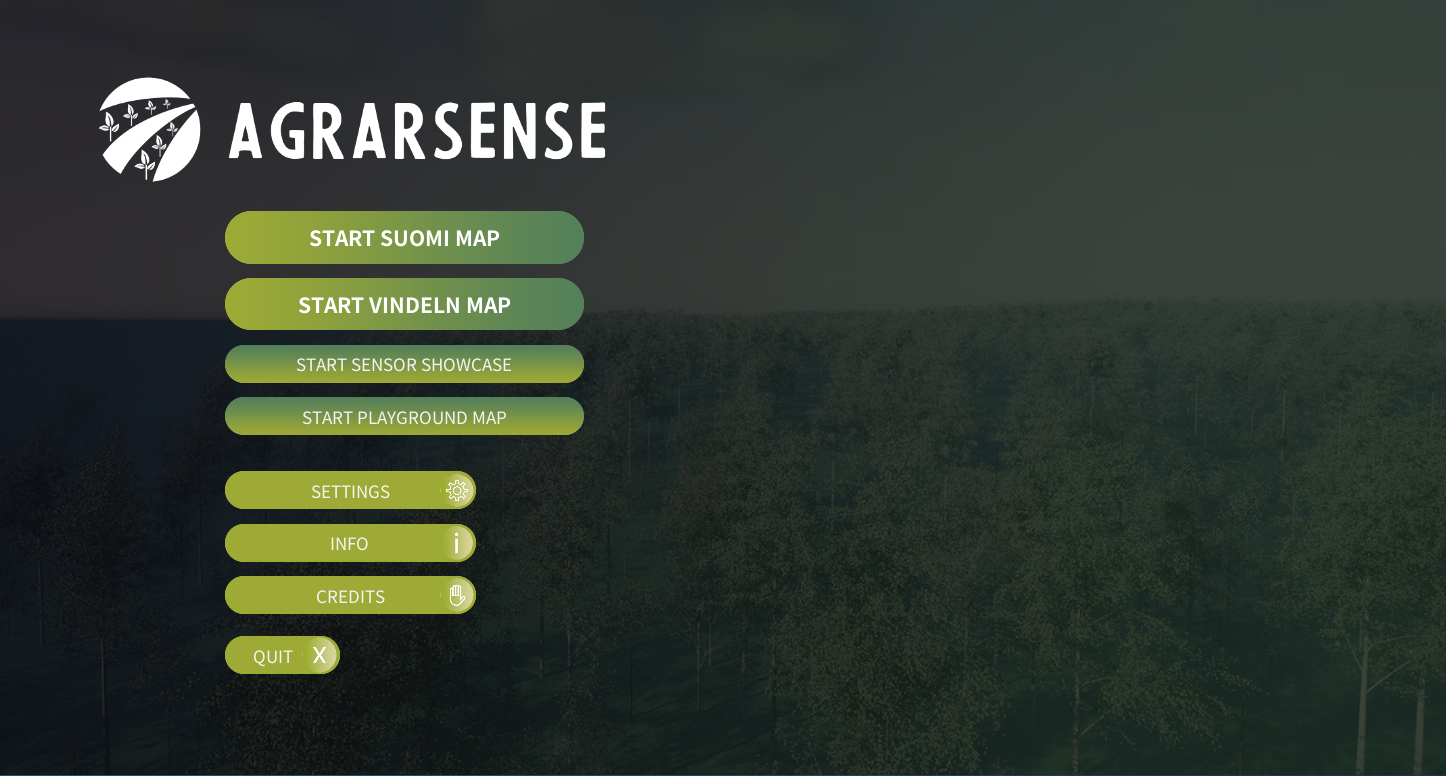
Maps
Main menu
When launching packaged version of the Simulator, the first you see is the main menu. In the main menu, you can tweak few settings, see project information and start different maps.
Note. Maps marked as (INST. SEGMENTATION) mean in these forest maps Instance Segmentation Camera Sensor works. Instance segmentation also works in Sensor Showcase and Playground maps.
Vindeln map
Vindeln forest digital twin located in Sweden.
Suomi map
Hirvas forest digital twin located in Finland, Rovaniemi.
Sensor show case map
Sensor show case map is a simple test map to test all the sensors the simulator offers. The map includes simple to use user interface to spawn, destroy and modify sensors. See Sensors documentation.
If ROS is successfully installed and connected, all the sensors will publish their data into their own topics. You can query all the current ROS topics with following command:
Playground map
Playground map is a map where you can test different Simulator features freely. The map only has one rock asset placed in the middle.
Use this map to test Asset placement tool, setting up sensors to Vehicle, testing ROS connectivity, spawning objects through ROS, creating your own little scenario etc.
Moving around the map
You can move around in the map with mouse, WASD and E/Q keys. F12 takes a screenshot.
Note. In the Sensor show case map, you need to enable movement in the left menu to be able move.
User interfaces
Toolbar user interface
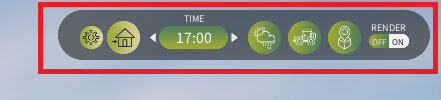
In the top right corner you can see toolbar user interface. With the buttons you can open different user interfaces. Read more about these user interfaces below.
You can also set Spectator world rendering on/off here. This is useful if you do not need the Spectator camera as this will save some rendering performance.
You can also click the Home icon to return to Main menu. When returning to Main menu, all dynamically spawned objects such as vehicles or sensors are destroyed.
Settings user interface
To open settings user interface, click settings icon (gear wheel) in the top left corner toolbar user interface. This will open the settings user interface on top of everything. In the settings panel you can change simulator graphics quality settings and tweak other settings.
Weather user interface
To open Weather user interface, click Weather icon in the top right corner toolbar user interface. This will open the Weather user interface on the left side of the screen.
In there you can change weather to your liking. Clicking 'Presets' button opens sub menu to save/load Weather presets. Presets will be saved locally to your computer. You can also export Weather parameters as .json file from the same sub menu.
Weather Controls
You can adjust a wide range of weather parameters to simulate different environments:
- Temperature
[-40.0°C to 40.0°C]
Controls whether snow/rain can be shwon and also affects Lidar sensor when using lidar noise model. - Precipitation
[0% to 100%]
Represents the amount of rain or snow in the scene. Precipitation is not global, but rather each vehicle has their own niagara particle system. Spectator actor also has its own particle system which can turned off in the settings. - Precipitation Particle Size
[1.0 to 5.0]
Changes the size of falling precipitation particles. - Cloudiness
[0.0 to 1.0]
Adjusts the cloud coverage in the sky. - Fog
[0% to 100%]
Adds volumetric fog to the scene. - Fog Falloff
[0.0 to 10.0]
Determines how quickly the fog density fades with distance. - Wind Intensity
[0.0 to 25.0]
Sets the strength of the wind. - Wind Direction
[0° to 360°]
Defines the wind direction. - Snow Amount
[0% to 100%]
Controls the amount of snow coverage on the ground. - Month
[1 to 12]
Sets the current in-game month, affecting seasonal visuals. - Time
[0 to 24]
Sets the hour of day (in 24-hour format). - Hide Tree Leaves (on/off)
Hides all tree leaves, useful for winter or underground scenes. - Hide Tree Branches (on/off)
Hides all tree branches, primarily for underground use cases. - Use Manual Leaf Colors (on/off)
Enables manual coloring for tree leaves, overriding month-based coloring. - Manual Leaf Colors
You can manually assign colors to the following tree types (RGBA):
- Birch
- Pine
- Spruce
- Alder
—Note: If a color is set to
(0, 0, 0, 0), it will be ignored.
Asset placement user interface
To open asset placement user interface, click asset placement icon in the top right corner toolbar user interface. This will open the asset placement user interface on the left side of the screen. From there you can spawn vehicles, foliage, props and walkers.

Vehicles listing user interface
To open the vehicles listing user interface, click the Vehicle listing icon in the top right corner toolbar user interface. This will open the listing menu on the left side of the screen. Listing shows all vehicles and sensors that have been spawned. Next to the vehicle's name is a button to move the vehicle into the garage where you can setup sensors and a button to remove the vehicle, which requires confirmation.
Developer Tools user interface
You can toggle 'Agrarsense Developer Tools' interface by clicking ctrl + F9 key combination at any point.
This user interface has tools mostly for different testing and development purposes. In packaged version of the Simulator, some of the features are disabled or not supported.
Unreal Engine Console
Unreal Engine Console allows interacting with Unreal Engine during runtime. It can be used for debugging, performance tuning, changing engine settings and accessing various features.
Available in Unreal Editor and also in shipping build when using our fork of the Unreal Engine. To open console in shipping build click ½ or § key on your keyboard. To hide it, click the same key 2 more times.
Note. Some Unreal Engine commands may not be available in shipping build.
Simulator Settings
The Simulator provides various settings that can be adjusted through multiple ways:
- Settings User Interface
- ROS Commands
- Unreal Engine Console Commands
When using LUAS Unreal Engine fork, console has been made accessible even in packaged builds. You can open the console by pressing the § or ½ key. From there, you can input Unreal Engine commands. Note that some commands may not function in packaged builds. Also, be aware that if you modify a setting through the Unreal Engine Console, AGRARSENSE user interfaces may not reflect the change immediately.
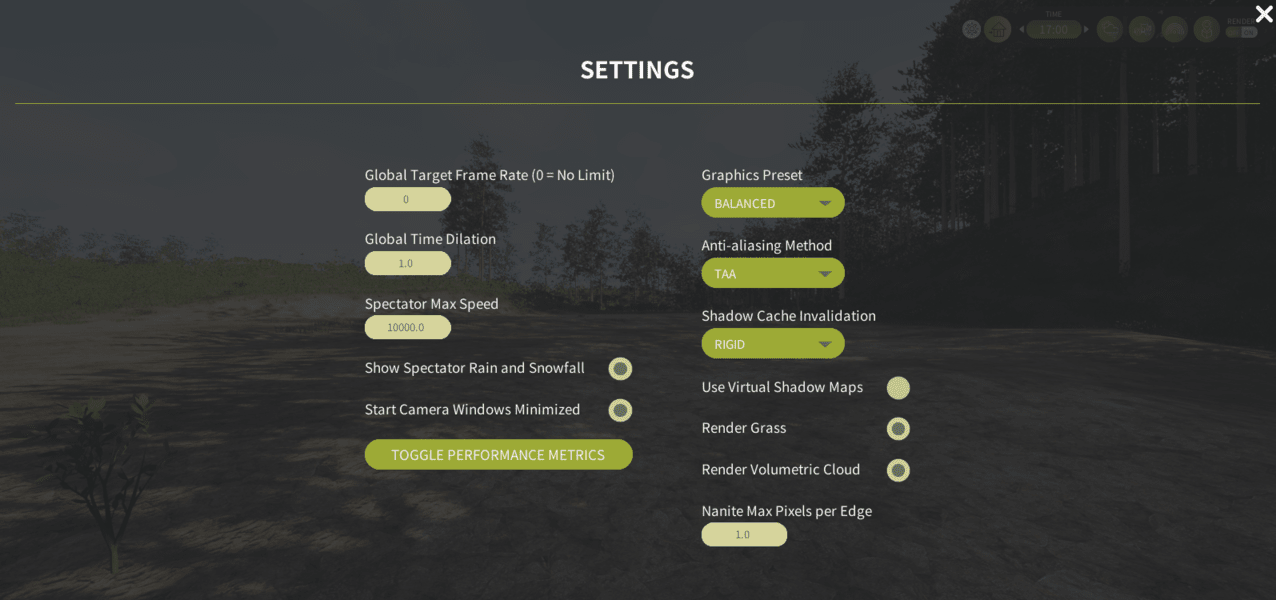
From the AGRARSENSE settings menu, you can adjust:
- Graphics quality
- Other settings
Graphics Settings
| Setting | Description | Options |
|---|---|---|
| Graphics Preset | Adjust the overall graphics quality. | Ultra Raytracing, Ultra, Balanced, Low |
| Anti-Aliasing Method | Set the anti-aliasing method. | None, FXAA, TAA, TSR |
| Shadow Cache Invalidation | Determine when to invalidate the shadow cache. | Rigid, Always |
| Use Virtual Shadow Maps | Enable or disable virtual shadow maps. | On/Off |
| Render Ground Vegetation | Toggle the rendering of ground vegetation. | On/Off |
| Render Volumetric Clouds | Toggle the rendering of volumetric clouds. | On/Off |
| Nanite Max Pixels per Edge | Adjust the maximum pixels per edge for Nanite rendering. | 0.00f - 2.00f |
Other Settings
| Setting | Description | Options |
|---|---|---|
| Global Target Frame Rate | Set the maximum target frame rate for the entire simulation. | 0-3000, 0 = unlimited |
| Global Time Dilation | Control the time dilation across the simulation. | 0.00f - 10.00f (1.0 = real time, >1.0 = slow motion, <1.0 = fast forward) |
| Spectator Max Speed | Adjust the maximum movement speed of the spectator actor. | 1000.0f - 20000.0f |
| Show Spectator Rain and Snowfall | Toggle rain/snowfall effects on the spectator camera. | On/Off |
| Start Camera Windows Minimized | Specify whether the Camera Sensor custom windows start minimized or on top. | On/Off |
Spawning things in the Simulator
The simulator provides two methods for spawning objects: Through the user interfaces and JSON files. More on spawning objects with json files below.
Objects in this instance means sensors, vehicles, walkers, foliage and props.
Through JSON files it's also possible to set behaviour for some objects. For example you can define Walker to walk specific path.
Interacting with the Simulator (ROS)
To interact with the spawned objects, such as accessing sensor data or controlling vehicles, the simulator utilizes ROS1, but you can use ROS2 via the ROS1-ROS2 bridge.
Through ROS, you can retrieve sensor data and send commands to control vehicles and some other elements within the simulator. More on that below.
Using Vehicles
See using vehicles
Using and setupping Sensors
See Sensors
Using and setupping Walkers
See Using walkers
Recording and Storage of Data
The Simulator can save data to disk. A log file is automatically created each time the Simulator starts. By modifying sensor parameters, users can set sensors to save their data to disk as well. All recorded data is automatically stored in the ROOT/Data directory, and this location cannot be changed. Each time the Simulator starts, a new subdirectory labeled "Run" is created within the Data directory to organize the data for that specific session.
If sensor is not attached to vehicle the data will be located:
If sensor is attached to vehicle the data will be located:
ROOT/Data here you can see all the runs.
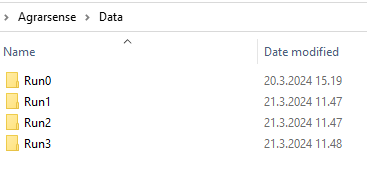
Under any Run subdirectory you can see all the data saved from that session.

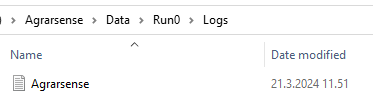
In the Logs subdirectory, you can find Agrarsense.txt, which logs various actions performed by the Simulator during the session. While not everything is logged, many important events such as sensor spawning and their parameters are recorded in this text file.
Note. The log file only shows up after the simulator has been closed.
Simulator JSON structure
The Simulator has a feature to export and spawn certain objects through JSON files.
To ensure your JSON files are properly structured for object spawning, you can refer to our example JSON files.
Example JSON file structure:
Where type defines what kind of object (sensor, vehicle, walker etc) we are spawning and model defines what specific model we want. Below is a list of available types - models.
Note 1. type is always lower case and model name is case sensitive!
Note 2. id is automatically lowered by the Simulator ID system.
Note 3. teleportSpectator and followObject are only available for vehicle, sensor and walker types. If both teleportSpectator and followObject are true, followObject is used.
Here are the list of different types and models:
| type | model |
|---|---|
vehicle | Forwarder |
vehicle | Harvester |
vehicle | Drone |
| type | model |
|---|---|
sensor | Radar |
sensor | Lidar |
sensor | RGBCamera |
sensor | DepthCamera |
sensor | DVSCamera |
sensor | SemanticSegmentationCamera |
sensor | InstanceSegmentationCamera |
sensor | ThermalCamera |
| type | model |
|---|---|
walker | Reindeer |
walker | Moose |
walker | Human |
| type | model |
|---|---|
foliage | Birch_Normal_3 |
foliage | Birch_Normal_8 |
foliage | Birch_Normal_12 |
foliage | Birch_Normal_18 |
foliage | Pine_Normal_3 |
foliage | Pine_Normal_8 |
foliage | Pine_Normal_12 |
foliage | Pine_Normal_18 |
foliage | Pine_Bend_12 |
foliage | Spruce_Normal_3 |
foliage | Spruce_Normal_8 |
foliage | Spruce_Normal_12 |
foliage | Spruce_Normal_18 |
foliage | Alder_Normal_3 |
foliage | Alder_Normal_8 |
foliage | Alder_Normal_12 |
foliage | Alder_Normal_18 |
foliage | Willow_Bush_01 |
foliage | Willow_Tree_01 |
foliage | Willow_Tree_02 |
foliage | Willow_Tree_03 |
foliage | Grass_01 |
foliage | Grass_02 |
foliage | Grass_03 |
foliage | Grass_04 |
foliage | Grass_05 |
| type | model |
|---|---|
prop | Forwarder_Prop |
prop | Rock0_4M |
prop | Rock0_6M |
prop | Rock1M |
prop | Rock1_5M |
prop | Rock2M |
prop | Rock4M |
prop | RockCliff1 |
prop | RockCliff2 |
prop | RockCliff3 |
prop | RockCliff3Alt |
prop | RockCliff4 |
prop | RockCliff4Alt |
prop | Rock1 |
prop | Rock1Alt |
prop | Rock2 |
prop | Rock2Alt |
prop | Rock3 |
prop | Rock3Alt |
prop | Rock4 |
prop | Rock4Alt |
prop | Stump_01 |
prop | Stump_02 |
prop | Stump_03 |
prop | PowerPylon |
Spawning objects by dragging and dropping JSON files
In addition to spawning objects through user interface and ROS, you have the option to spawn objects defined in JSON files by simply dragging and dropping the corresponding file(s) into the simulator main window.

Simulator ROS topics
All Simulator ROS topics topics are in lower case. All topics start with:
You can query all active ROS topics with following command:
Simulator Info ROS topic
AGRARSENSE Simulator automatically creates /agrarsense/out/info topic when the Simulator successfully connects to ROS. The Simulator publishes info messages as string to this ROS topic when something interesting happens in the Simulator, for example when sensor is spawned or destroyed. This topic is mainly for info/debugging purposes.
ROS Command topic
Since the Simulator does not provide any direct API, /agrarsense/in/commands ROS topic can be used to set, get, destroy many Simulator things.
This topic is created automatically when the Simulator successfully connects to ROS.
To use this, publish string message in {COMMAND} {POSSIBLE_VARIABLE} format which the Simulator parses into Simulator action. See below for all available Commands and its parameters.
More examples:
All available Commands:
| Command | Variable | Description | Example |
|---|---|---|---|
Help | - | Print all available Simulator ROS commands to /agrarsense/in/commands and /agrarsense/out/info ROS topics | rostopic pub /agrarsense/in/commands std_msgs/String "help" |
Quit | - | Quit the simulator | rostopic pub /agrarsense/in/commands std_msgs/String "quit" |
LoadMap | map name | Load map by its name. | rostopic pub /agrarsense/in/commands std_msgs/String "loadmap mainmenu" |
UnrealCommand | UE console command | Execute Unreal Engine console command. Note that not all Unreal console commands work in packaged builds. | rostopic pub /agrarsense/in/commands std_msgs/String "unrealcommand r.setRes 1920x1080" |
Pause | - | Pause simulation | rostopic pub /agrarsense/in/commands std_msgs/String "pause" |
UnPause | - | Unpause simulation | rostopic pub /agrarsense/in/commands std_msgs/String "unpause" |
NextFrame | - | Advance 1 frame before pausing again | rostopic pub /agrarsense/in/commands std_msgs/String "nextframe" |
AdvanceFrames | Integer | Advance given number of frames before pausing | rostopic pub /agrarsense/in/commands std_msgs/String "advanceframes 10" |
AdvanceTime | float value | Advance given amount of time in seconds before pausing simulation | rostopic pub /agrarsense/in/commands std_msgs/String "advancetime 1.0" |
ResetDrone | id | Reset drone forces to standstill | rostopic pub /agrarsense/in/commands std_msgs/String "resetdrone drone" |
TeleportSpectator | x,y,z or x,y,z,yaw,pitch,roll | Teleport Spectator Actor to certain XYZ location and optional pitch yaw roll rotation. | rostopic pub /agrarsense/in/commands std_msgs/String "teleportspectator 100,150,20,0,0,0" |
TeleportSpectatorHeight | x,y,z or x,y,z,yaw,pitch,roll | Teleport Spectator Actor to a specific XY location, where Z is height in meters above ground. Optional pitch, yaw, and roll rotation. | rostopic pub /agrarsense/in/commands std_msgs/String "teleportspectatorheight 100,150,20,0,0,0" |
TeleportById | ActorID x,y,z,yaw,pitch,roll | Teleport Actor by ID to certain XYZ location and optional pitch yaw roll rotation. "TeleportById ID X,Y,Z,Yaw,Pitch,Roll" | rostopic pub /agrarsense/in/commands std_msgs/String "teleportbyid lidar 50,100,20,90,0,0" |
TeleportByIdHeight | ActorID x,y,z,yaw,pitch,roll | Same as TeleportById but Z indicates wanted height in meters from the ground. | rostopic pub /agrarsense/in/commands std_msgs/String "teleportbyid lidar 50,100,20,90,0,0" |
TeleportSpectatorToInstanceID | Label index and ID of the Object | Teleports spectator to instance segmentation ID if found | rostopic pub /agrarsense/in/commands std_msgs/String "TeleportSpectatorToInstanceID 1 5" |
DestroyObjectByID | ID of the Object | Destroy Object by its ID | rostopic pub /agrarsense/in/commands std_msgs/String "destroyobjectbyiD lidar" |
DestroyObjectByInstanceID | Label index and ID of the Object | Destroy Object by instance segmentation ID | rostopic pub /agrarsense/in/commands std_msgs/String "DestroyObjectByInstanceID 1 5" |
DestroyAllSensors | - | Destroy all sensors | rostopic pub /agrarsense/in/commands std_msgs/String "destroyallsensors" |
DestroyAllWalkers | - | Destroy all Walkers | rostopic pub /agrarsense/in/commands std_msgs/String "destroyallwalkers" |
DestroyAllVehicles | - | Destroy all Vehicles | rostopic pub /agrarsense/in/commands std_msgs/String "destroyallvehicles" |
DestroyTreesArea | X,Y,Z sizeX, sizeY, sizeZ | Destroy trees from certain box area. | rostopic pub /agrarsense/in/commands std_msgs/String "DestroyTreesArea 0,0,0 300,300,300" |
DestroyAssetsArea | X,Y,Z sizeX, sizeY, sizeZ | Destroy assets (trees, rocks etc) from certain box area. | rostopic pub /agrarsense/in/commands std_msgs/String "DestroyAssetsArea 0,0,0 300,300,300" |
GetMaps | - | Print all available maps | rostopic pub /agrarsense/in/commands std_msgs/String "get,aps" |
GetSensors | - | Print all sensors | rostopic pub /agrarsense/in/commands std_msgs/String "getsensors" |
GetVehicles | - | Print all Vehicles | rostopic pub /agrarsense/in/commands std_msgs/String "getvehicles" |
GetWalkers | - | Print all Walkers | rostopic pub /agrarsense/in/commands std_msgs/String "getwalkers" |
GetIds | - | Print all objects IDs separated by comma | rostopic pub /agrarsense/in/commands std_msgs/String "getids" |
SetGlobalTargetFrameRate | integer value from 0-300 | Sets a target frame rate in frames per second that Simulutor will attempt to maintain. Value 0 means unlimited and is the default value. | rostopic pub /agrarsense/in/commands std_msgs/String "setglobaltargetframeRate 60" |
SetGlobalTimeDilation | float value from 0.00 - 10.00 | Set simulation global time dilation. 1.0 means real-time, while values less than 1.0 slow down time, and values greater than 1.0 speed it up. | rostopic pub /agrarsense/in/commands std_msgs/String "setglobaltimeDilation 0.5" |
SetQualityLevel | ultra or low | Set simulation graphics quality level | rostopic pub /agrarsense/in/commands std_msgs/String "setqualitylevel ultra" |
SetWorldRendering | true, false, 1 or 0 | Enable or disable main window (Spectator camera) World rendering | rostopic pub /agrarsense/in/commands std_msgs/String "setworldrendering false" |
setsavecombinedpointcloud | true, false, 1 or 0 | Should all lidar sensors combined pointcloud be saved to disk | rostopic pub /agrarsense/in/commands std_msgs/String "setsavecombinedpointcloud true" |
setallsensorsenabled | true, false, 1 or 0 | Set all sensors either enabled or disabled based on given parameter | rostopic pub /agrarsense/in/commands std_msgs/String "setallsensorsenabled false" |
SetSpectatorOverlapRadius | float value, in meters | Set Spectator actor overlap sensor radius in meters, default 15 meters. | rostopic pub /agrarsense/in/commands std_msgs/String "SetSpectatorOverlapRadius 25" |
SetWPODistance | - | Set World Position Offset render distance, only applies to foliage and other static meshes | rostopic pub /agrarsense/in/commands std_msgs/String "setwpodistance 35000" |
SetNaniteMaxPixelsPerEdge | - | Set Nanite Max pixels per edge. Lower values = more detail, lower performance. Higher values = lower detail, more performance. Default 1.0 by the engine. | rostopic pub /agrarsense/in/commands std_msgs/String "SetNaniteMaxPixelsPerEdge 1.0" |
enableallsensors | - | Enable all sensors | rostopic pub /agrarsense/in/commands std_msgs/String "enableallsensors" |
disableallsensors | - | Disable all sensors, sensors will stop simulating but will reamin in the world. | rostopic pub /agrarsense/in/commands std_msgs/String "disableallsensors" |
setsensorenabled | ID & true, false, 1 or 0 | Set specific sensor by ID enabled or disabled. For example: 'setsensorenabled lidar true' | rostopic pub /agrarsense/in/commands std_msgs/String "setsensorenabled lidar false" |
SpawnObjects | full path to JSON file | Spawn object(s) defined in JSON file into the simulation world | rostopic pub /agrarsense/in/commands std_msgs/String "spawnOojects C:/Agrarsense/Examples/ExampleJsonFiles/lidar.json" |
ChangeWeather | full path to JSON file | Change simulation weather parameters defined in JSON file | rostopic pub /agrarsense/in/commands std_msgs/String "changeweather C:/Agrarsense/Examples/ExampleJsonFiles/weather_winter.json" |
ChangeColors | full path to JSON file | Change semantic camera colors defined in JSON file | rostopic pub /agrarsense/in/commands std_msgs/String "changecolors C:/Agrarsense/Examples/ExampleJsonFiles/semantic_camera_colors.json" |
visualizeoverlaps | true, false, 1 or 0 | Set visualize All Overlap sensors bounds. Visible only for Spectator camera. | rostopic pub /agrarsense/in/commands std_msgs/String "visualizeoverlaps true" |
setoverlapradiusbyid | sensor_id float | Change Overlap sensor area bounds, radius in meters | rostopic pub /agrarsense/in/commands std_msgs/String "setoverlapradiusbyid sensor1 100,200,300" |
setoverlappositionbyid | sensor_id x,y,z | Change Overlap sensor relative position | rostopic pub /agrarsense/in/commands std_msgs/String "setoverlappositionbyid sensor1 10,20,30" |
ExportAll | - | Export everything. File(s) will be exported to SIMULATION_ROOT/Data/ExportedJsonFiles directory | rostopic pub /agrarsense/in/commands std_msgs/String "exportall" –once |
ExportWeather | - | Export current simulation weather parameters into JSON file. File will be exported to SIMULATION_ROOT/Data/ExportedJsonFiles/ExportWeather.json | rostopic pub /agrarsense/in/commands std_msgs/String "exportweather" –once |
ExportWalkers | - | Export all Walkers from the simulation into JSON files. File will be exported to SIMULATION_ROOT/Data/ExportedJsonFiles/ExportWalker.json | rostopic pub /agrarsense/in/commands std_msgs/String "exportwalkers" –once |
ExportVehicles | - | Export all Vehicles from the simulation into JSON files. File will be exported to SIMULATION_ROOT/Data/ExportedJsonFiles/ExportVehicle.json | rostopic pub /agrarsense/in/commands std_msgs/String "exportvehicles" –once |
ExportSensors | - | Export all Sensors into JSON files. This doesn't take into account if sensor is attached to Vehicle. This will export each sensor as separate JSON file. | rostopic pub /agrarsense/in/commands std_msgs/String "exportsensors" –once |
ExportFoliage | - | Export all Foliage into JSON files. This doesn't take into account if sensor is attached to Vehicle. This will export each sensor as separate JSON file. | rostopic pub /agrarsense/in/commands std_msgs/String "exportfoliage" –once |
ExportProps | - | Export all Props into JSON files. This doesn't take into account if sensor is attached to Vehicle. This will export each sensor as separate JSON file. | rostopic pub /agrarsense/in/commands std_msgs/String "exportprops" –once |
ExportObjects | - | Export all objects in the level to CSV file. The File will contain all objects Instance ID, world locatiom, rotation and GPS coordinates. | rostopic pub /agrarsense/in/commands std_msgs/String "exportprops" –once |
SetVehicleMeshVisibility | ID true/false | Set vehicle (forwarder / harvester) meshes hidden/visible | rostopic pub /agrarsense/in/commands std_msgs/String "vehiclemeshvisibility forwarder false" –once |
Spawn objects through ROS
To spawn objects to simulation through ROS, you can utilize ROS commands topic and Simulator JSON structure.
You can spawn the following types of objects through JSON files:
- Vehicles
- Sensors
- Vehicles with sensors
- Foliage
- Props
- Walkers
Spawning objects through ROS is a straightforward. Publish message to the /agrarsense/in/commands topic in following format: SpawnObjects FULL_PATH/YOUR_JSON_FILE.json
Destroy objects through ROS by id
In the simulation, every dynamically spawned object, including sensors, vehicles, foliage, props, and walkers, is assigned a unique identifier (ID). Objects can be removed from the simulation by referencing their corresponding ID. It's important to note that all IDs are consistently lowercase.
To destroy an object through ROS, you can utilize the Commands topic with the following command:
When spawning objects through ROS, you have the option to manually define the ID. For instance:
In the above example, if the specified ID (myawesomelidar) already exists in the simulation, an incremental number is appended to ensure uniqueness (e.g., myawesomelidar, myawesomelidar, and so on).
If no ID is provided, a default ID is assigned. This default ID varies for each object type. For sensors, the default ID is the sensor name. For instance, the default name for a Lidar sensor is "lidar", and subsequent Lidars are named lidar1, lidar2, and so forth. If a object with ID lidar1 is destroyed, and new object is spawned with same id, the ID is reused.
To retrieve a list of all IDs for specific object types, you can use the following ROS commands:
Destroy Objects in a Defined Area (Using ROS and JSON)
Below commands allows you to delete specific objects (such as trees, rocks, and other assets) within a defined area.
Note: This will not delete vehicles, sensors, or walkers.
Destroy Objects via ROS Commands
The following examples illustrate how to execute this in both ROS1 and ROS2. The box is defined by a starting position (0,0,0) and a size (300,300,300), which corresponds to the volume in which objects will be destroyed.
Destroy Objects via JSON
You can also define areas for object destruction using a JSON file. This file can be spawned via ROS or manually drag-dropped into the simulator window (Windows only). Here's an example of how to set up the file.
Note: This will not delete vehicles, sensors, or walkers.
Simulator Launch arguments
The Simulator has few custom launch arguments you can give when launching the Simulator. You can also use Unreal Engine default command line arguments like -Fullscreen.
Packaged build:
Open command line in packaged build location and launch the simulator from command line.
Editor:
Modify OpenProject.bat or LinuxOpenProject.sh and add launch argument after Agrarsense.uproject.
| Launch argument | Variable | Description |
|---|---|---|
--workersthreadpool | integer value, 15 for example | Changes the number of worker threads the Simulator can use. |
--no-spectator-rendering | - | Set spectator rendering off when launching the Simulator. This can be turned back on via ROS command or through UI. |
--quality-level= | "Ultra", "Balanced" or "Low" | Set Quality level when Simulator starts. Default is Balanced. This can be changed via ROS command or through UI. |
--antialiasing= | 0-3 | Set AntiAliasing method. This can be changed later in the settings. 0 = None, 1 = FXAA, 2 = TAA and 3 = TSR. Default TAA. |
--no-ros | - | Don't try to connect to ROS at all. |
--no-ros-async | - | Don't try to connect to ROS asynchronously which is the default behaviour. |
--ros-host-ip= | 127.0.0.1 for example | Set ROS bridge host ip, default 127.0.0.1 |
--ros-port= | 9090 for example | Set ROS bridge port, default 9090 |
--ros-max-retries= | integer value -3 for example | Number of ROS bridge connection tries before giving up, default 3 |
--save-combined-pointcloud | - | Save all lidar sensors combined pointcloud to disk |
--vindeln | - | Changes map to Vindeln at startup |
--rovaniemi | - | Changes map to RovaniemiForest at startup |
--playground | - | Changes map to Playground at startup |
Changing number of worker threads
Following text applies if you are using Lapland UAS fork of the Unreal Engine (requires to have a GitHub account linked to Unreal Engine's account. to see this repository).
By default the Simulator uses maximum number of CPU threads - 1 instead of maximum number of CPU cores - 1 which is the default Unreal Engine behaviour.
So for example if you have a CPU with 16 threads, 15 worker threads will be available by the Simulator.
Some parts of the simulator are multithreaded which will benefit with this thread change, especially when simulating multiple sensors at the same time.
If you experience problems or want to limit the number of worker threads for some reason, you can limit the number of worker threads when launching the Simulator with --workersthreadpool {number} launch argument. Otherwise you don't need to touch this.
To change the number of worker threads when launching packaged build of the Simulator, open terminal at packaged build location and start the simulator from terminal. You can check the number of spawned worker threads by clicking CTRL + F9 which opens Developer Tools menu, in this menu it should show the number of worker threads used.